Prototyping
One of our team's strengths was that we prototyped early and we prototyped a lot. We mocked up many different platforms to test boat driving, and we were driving in the water (radio-controlled) more than two weeks in advance of the presentation date. The five prototyping phases are listed below, and after every description are the major design issues we learned when designing/ assembling/ running for that respective prototype. The dates indicate the days when the prototypes were conceived.
Paddle Wheels or Propellers?
Form follows function, so the first and most basic decision that had to be made was how the boat was going to drive. After buying a cheap propeller boat and seeing how hard it was to maneuver we tried out several paddle wheel prototypes and found their behavior to be much more favorable to the game's objectives. We still wanted to be as fast as we can so latter prototypes focused on trying to optimize for speed, which we found was limited based on weight. Using our trusty waterproof tape, low-density foam, and AAA batteries we were able to get our boat as light as possible.
Phase I: Javier (04/28/2011)
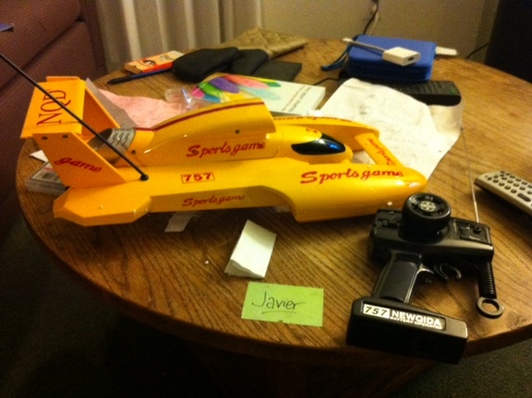
A picture of Javier.
We bought a cheap boat from Fry's that had two differential propellers that drove bang-bang. We drove it around the Halo fountain, in and out of the falls and over the lights, until the battery (we think / we hope) gave up on us. When we took it apart we saw a lot of hair stuck on the shafts, which was one concern in guiding us to later choose paddle wheels.
Phase II: David's new bathtub toy (05/01/2011)
A quick prototype was built using propellers made out of thin aluminum that had strips cut out of the corners and bent at a 90 degree angle. The "boat" runs on Lego motors and a Lego scout ("mindstorms" derivative). See how nimble it is! This is what ultimately drove us to choose a paddle wheel design. We wanted to be slow and agile rather than fast and uncontrollable.
Phase III: First full-size prototype (05/07/2011)
We started with a very basic 2D platform with slots to accommodate 6-inch paddle wheels. (1) The first iteration of the platform was quite slow because it had a high water level with respect to the platform (about half inch), so the paddle wheel was dragging a lot of water. (2) The second iteration consisted of us putting a thin piece of foam underneath it. This made the paddles submerge less and consequently made the boat faster. (3) We noticed that the paddle wheel kicked up water in its slot, leaving the water nowhere to go but back onto the paddle wheel, substantially slowing us down. We cut out slots to accommodate these streamlines, making the platform look like a boat with two pontoons. This made the boat a whole lot faster. (4) There was a lot of rippling happening at the front of the boat, so we put a draft at the front of the boat, which made it ride a lot smoother. We even tried using a fan to blow us around (but that drew way more current, and would be a lot less nimble)! For more of the videos see this blog post.
First full-size prototype
Fan boat prototype
Phase IV: More refinement (05/10/2011)
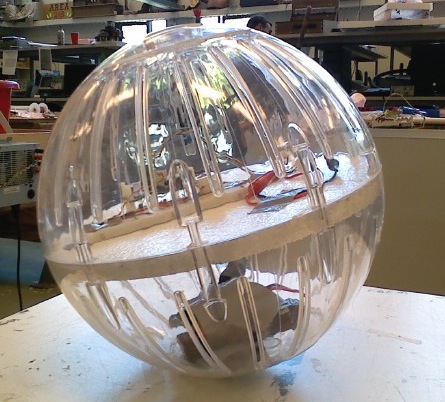
Prototype of CVC
We refined our boat to give more streamlined flow paths for water
entering and leaving the paddle wheels to minimize splash. In this build
phase, we also started the prototype for our CVC using a chinchilla ball with a piece of foam in the middle to hold all of our protoboard circuits. The video below shows this platform capturing an atoll more than a week (May 17th) before the presentation day! This platform was actually conceived on May 10th, which was our first day driving with radio control.
Phase V: Presentation boat (05/22/2011)
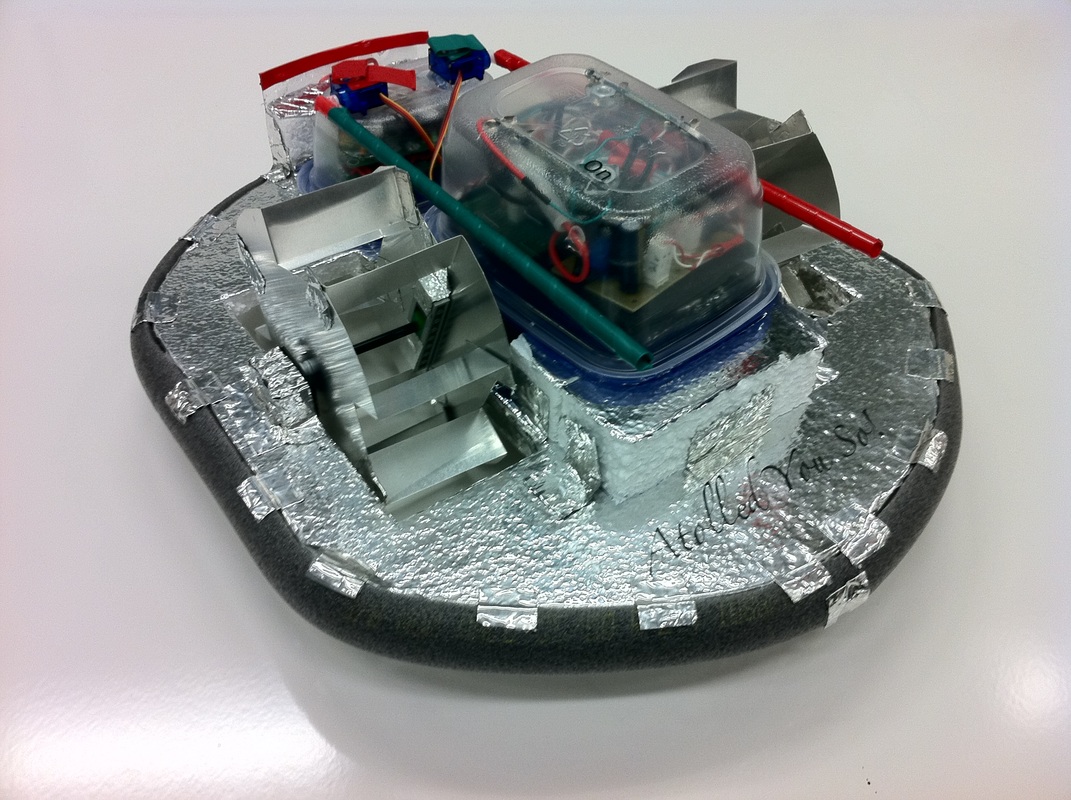
Unlike the previous prototypes, this last platform was made from more than one piece. We cut a top piece (using a solidworks template) using 1/2" foam, and then used 2" foam to cut and shape the main center pontoon and two smaller side pontoons. We then attached the pontoons to the top platform using our trusty waterproof tape. We encased our electronics into two Safeway (TM) resealable plastic tubs.
Here is where we finalized the design for the CVC. We used servos (after finding out that LEDs do not really work out in the sun light) with acrylic lenses to show team color and captured atolls. We also used foam pads to shape hand prints to put the force sensitive resistor (FSR) and buttons underneath the palm and thumb pads respectively.
Here is where we finalized the design for the CVC. We used servos (after finding out that LEDs do not really work out in the sun light) with acrylic lenses to show team color and captured atolls. We also used foam pads to shape hand prints to put the force sensitive resistor (FSR) and buttons underneath the palm and thumb pads respectively.
